Self Injection Guide
Firstly, read through the article comprehensive self-injection guide for HRT.
Instructions ahead will assume you have read through the guide. The following instructions are primarily taken from Planned Parenthood’s injection guide. Read the following in its entirety before injecting:
-
Wash your hands and prepare 2 alcohol swabs (1 for vial, 1 for skin), your drawing needle (if wanted) and injecting needle.
Generally, needles 25g or lower are used for drawing. For Subcutaneous (SubQ) injecting, a needle that is 27g or above (as close to 30g as possible) is recommended, as thinner needles make the process painless. We have a trypanophobe (fear of needles) in the server, and 27g was ‘pretty painless’ for her. For Intramuscular (IM) injections, however, the needle must be 1-1.5 inches long. Needles of such length are difficult to find at higher gauges, thus you may have to go with 22g to 25g for it.Although needles low gauge needles are fine for drawing, thicker needles increase vial coring risk depending on how (un)skilled you are at it. Coring is discussed later. -
Open the vial.
The process for this will differ depending on whether the vial has a plastic cap or an all-metal design:
- Plastic cap: Lift the plastic cap carefully the first time to open it.
- All-metal: Lift and remove the circular center part on top of the metal cap, using the tip of a knife or your finger nail. See the figure below:
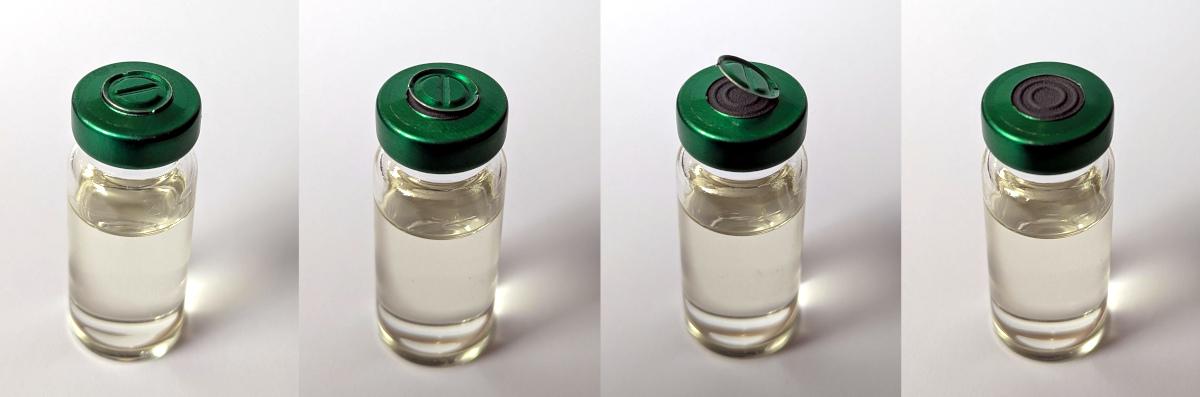
In both cases, the exposed rubber is where you will be drawing from. Do not remove the metal cap entirely, it is needed to keep the rubber stopper in place.
-
Clean the rubber stopper with an alcohol swab.
-
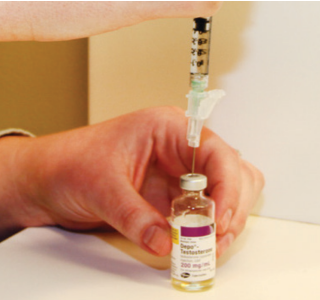
Hold the vial on a flat surface and insert the needle straight down through the center of the rubber stopper into the bottle.
Do not insert the needle at an angle, and do not rotate the needle once inserted. This can shave off a part of the rubber stopper, causing ‘vial coring’ wherein some of the rubber falls into the vial, contaminating your medicine. -
Push the plunger of the syringe down and push the air from the syringe into the vial
-
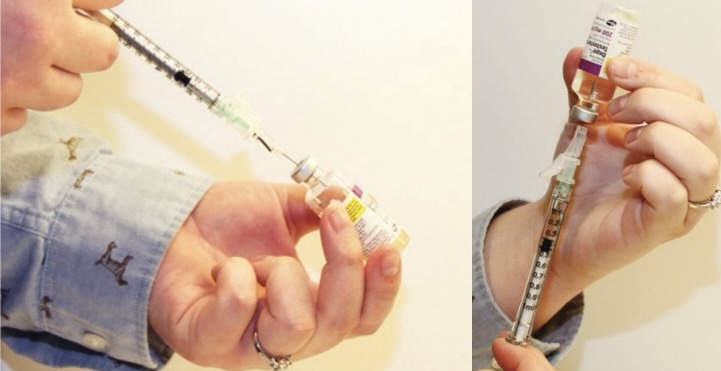
Keeping the needle in the vial, turn the vial upside down. Position the needle so the liquid is covering the tip of the needle. You may need to pull the needle out slightly to make sure the tip is completely covered by the liquid.
-
Keeping the vial upside down, slowly pull back on the plunger to fill the syringe with the medication to your dosage.
-
Keeping the needle in the vial, check for air bubbles in the syringe. If present, gently tap the syringe with your fingers until the air bubbles rise to the top of the syringe. Then slowly push the plunger up to force the air bubbles out of the syringe without removing the needle from the bottle.
-
After the air bubbles are gone, pull the plunger back to match your dose.
-
Pull the syringe with the needle out of the bottle, remove the drawing needle (and discard it), and equip the injecting needle. Do not press on the plunger while changing needles.
-
Clean the injection site with an alcohol swab; let the skin air dry. Do not pat or rub the skin to dry it.
Drying of the alcohol is what kills the bacteria. Let it dry properly.
From here, instructions split off into two depending on whether you administer it Intramuscularly (IM) or Subcutaneously (SubQ).
-
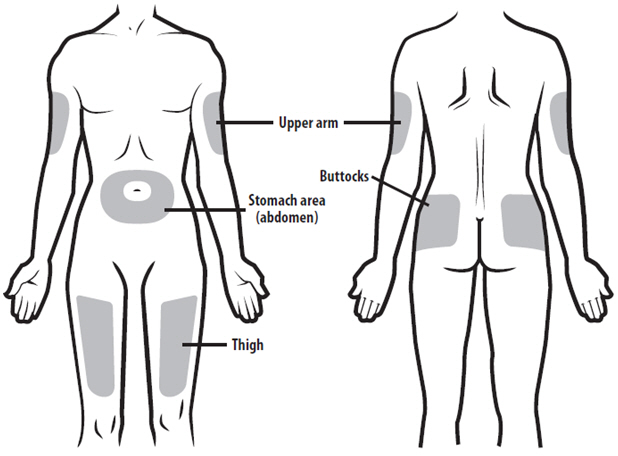
Select an injection site.

-
Pull the skin tight around the injection site.
-
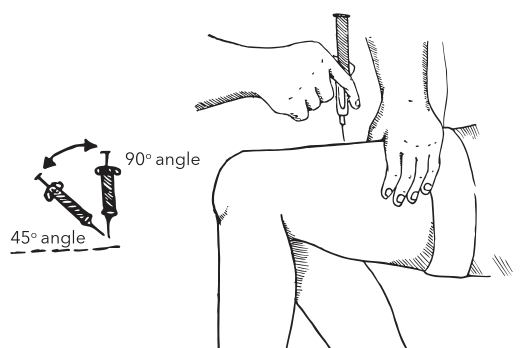
Insert the IM needle into the muscle at a 90° angle with one quick and firm motion.
Do it like a dart for good form, but don’t stab yourself either.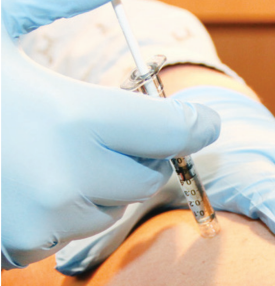
-
After inserting the needle into the muscle, keep the skin pulled tight and firmly push the plunger down slowly and completely to finish the injection.
-
Pull back on the syringe to remove the needle from your skin. Pull the syringe and needle out at the exact same angle you entered with.
-
Lightly rub the injection site to spread the dose.
-
Band-aid time. Good job.
-
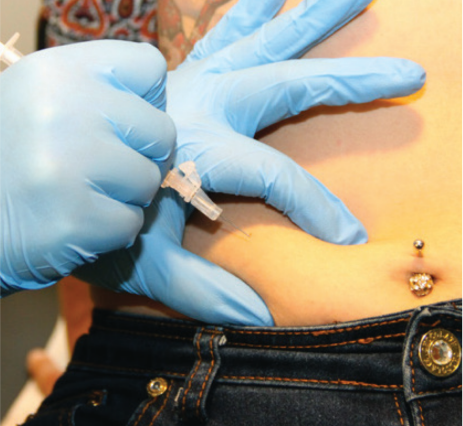
Select an injection site. Whichever site is chosen, you should be able to firmly grasp and pinch up approximately a 1-inch fold of skin. If you choose the abdomen, avoid any bony parts and the belly button.
-
Hold the prepared syringe with the hand you will inject with. With the other hand, pinch a fold of skin (you will inject into the skin between your fingers).
-
With one quick and firm motion, insert the needle either directly into the skin fold at a 90° angle, or angle it slightly (45°), if that is easier.
-
After inserting the needle under the skin, keep the skin pinched up as you complete the injection by pushing firmly and slowly down completely on the plunger.
-
Wait 5 to 20 seconds (higher gauge = higher time), and then pull back on the syringe to remove the needle from your skin. Pull the syringe and needle out at the exact same angle you entered with.
-
Band-aid time. Good job. Do not rub your skin!